


Welcome to the enchanting world of the Cherry Blossom Dream Cake, where beauty and flavor intertwine to create a truly unforgettable dessert. Inspired by the delicate petals of cherry blossoms, this cake captures the essence of spring with its soft pink hue and delightful floral notes. Imagine slicing into a moist, fluffy cake that not only tantalizes your taste buds but also serves as a stunning centerpiece for any occasion.

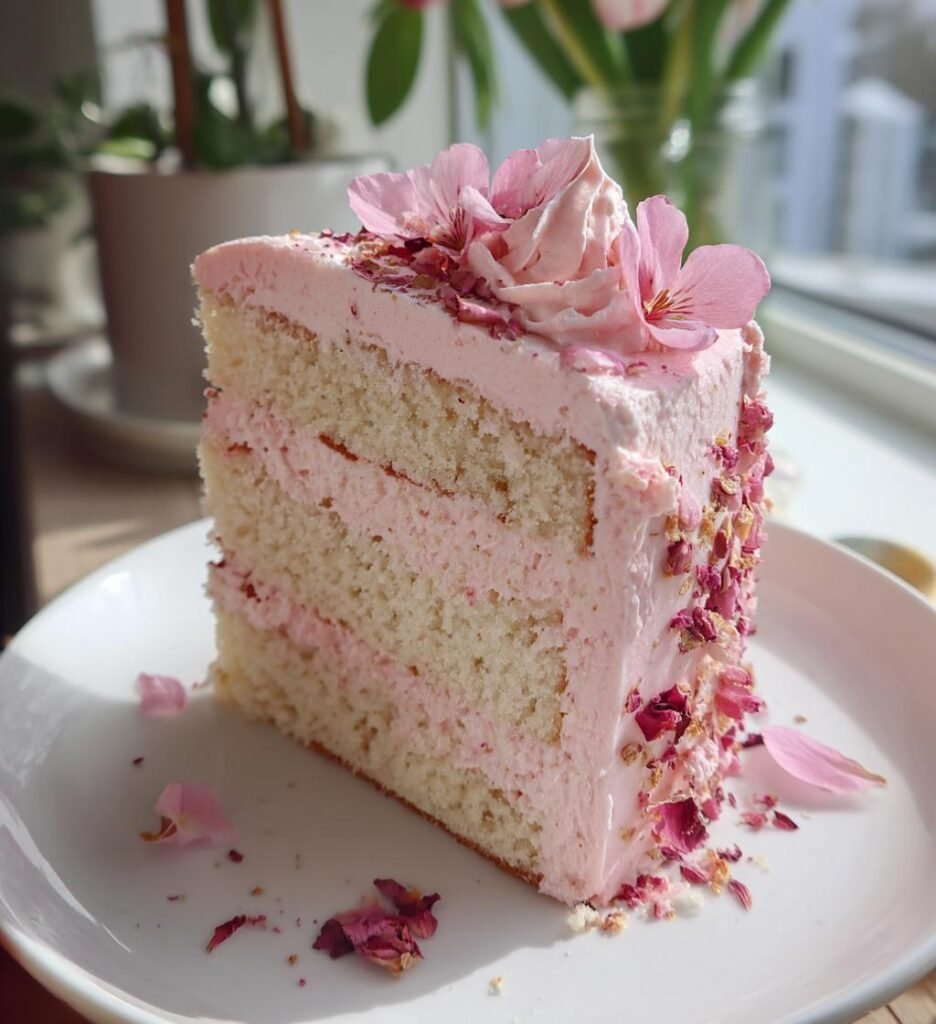
The Cherry Blossom Dream Cake stands out with its unique flavor profile, thanks to the infusion of cherry blossom extract, which adds a subtle sweetness and floral aroma that is simply irresistible. Topped with creamy buttercream frosting and adorned with real cherry blossom petals, this cake is not just a treat for the palate but a feast for the eyes as well. Whether you’re celebrating a special occasion or simply want to indulge in a slice of springtime bliss, this cake is sure to impress your family and friends.
Join me as we embark on the journey to create this gorgeous Cherry Blossom Dream Cake, perfect for springtime festivities, birthdays, or any gathering that calls for something special!
Ingredients List
- 2 cups all-purpose flour
- 1 1/2 cups granulated sugar
- 1 cup unsalted butter, softened
- 4 large eggs
- 1 cup milk
- 2 teaspoons baking powder
- 1 teaspoon vanilla extract
- 1/2 teaspoon salt
- Cherry blossom extract to taste
- Pink food coloring
- Buttercream frosting
- Cherry blossom petals for decoration
How to Prepare Cherry Blossom Dream Cake
Preheat and Prepare
To begin your baking adventure, it’s crucial to preheat your oven to 350°F (175°C). Preheating ensures that your cake bakes evenly and rises properly. While the oven is heating, take a moment to prepare your cake pans. Grease and flour two 9-inch round cake pans to prevent the cake from sticking. This step is vital for achieving a flawless cake release once it’s baked.
Creaming the Butter and Sugar
In a large mixing bowl, combine the softened unsalted butter and granulated sugar. Using an electric mixer, beat the mixture on medium speed until it becomes light and fluffy, which should take about 3-5 minutes. The texture should be pale and airy, indicating that enough air has been incorporated. This creaming process is essential as it helps to create a tender crumb in your Cherry Blossom Dream Cake.
Mixing Wet Ingredients
Next, it’s time to add the wet ingredients to the creamed mixture. Begin by adding the eggs, one at a time, mixing well after each addition to ensure they are fully incorporated. After the eggs, pour in the milk and vanilla extract, mixing on low speed until just combined. This gradual addition helps maintain the airy texture achieved during the creaming process.
Combining Dry Ingredients
In a separate bowl, whisk together the all-purpose flour, baking powder, and salt. This step is crucial for evenly distributing the leavening agent (baking powder) throughout the flour, which aids in achieving a uniform rise in your cake. Make sure to sift the flour mixture if it’s lumpy to ensure a smooth batter.
Mixing the Batter
Now, it’s time to combine your dry and wet ingredients. Gradually add the flour mixture to the wet ingredients while mixing on low speed. Be careful not to overmix; stop as soon as you see no dry flour. At this point, add the cherry blossom extract and a few drops of pink food coloring. Mix gently until everything is just combined, and the batter takes on a lovely pink hue.
Baking the Cake
Once your batter is ready, divide it evenly between the prepared cake pans. Smooth the tops with a spatula for a nice finish. Place the pans in the preheated oven and bake for 25-30 minutes. To check for doneness, insert a toothpick into the center of the cakes; if it comes out clean or with a few moist crumbs, your cakes are ready. Keep an eye on them to prevent overbaking.
Cooling and Decorating
After baking, remove the cakes from the oven and allow them to cool in the pans for about 10 minutes. This cooling period helps them firm up a bit, making them easier to remove from the pans. Carefully turn the cakes out onto a wire rack to cool completely. It’s important to let the cakes cool entirely before frosting them with buttercream. Once cooled, you can decorate your Cherry Blossom Dream Cake with a generous layer of buttercream frosting and adorn it with real or edible cherry blossom petals for a stunning finish.
Nutritional Information Section
Here’s an estimated nutritional breakdown for one slice of the Cherry Blossom Dream Cake, based on a total yield of 12 servings:
- Calories: 350
- Fat: 18g
- Saturated Fat: 10g
- Unsaturated Fat: 8g
- Trans Fat: 0g
- Cholesterol: 70mg
- Sodium: 150mg
- Carbohydrates: 42g
- Fiber: 1g
- Sugar: 28g
- Protein: 4g
These values are estimates and can vary based on the specific ingredients used and portion sizes. For the best accuracy, consider calculating based on the exact ingredients you choose.
Why You’ll Love This Recipe
- Stunning Visual Appeal: The soft pink hue and delicate cherry blossom decorations make this cake a showstopper for any occasion.
- Unique Flavor Profile: Infused with cherry blossom extract, this cake offers a subtle floral sweetness that is both refreshing and delightful.
- Easy to Prepare: With straightforward steps and common ingredients, even novice bakers can master this recipe with confidence.
- Perfect for Celebrations: Whether it’s a birthday, wedding, or spring gathering, this cake is ideal for making memorable moments.
- Customizable: The recipe allows for variations, so you can experiment with different flavors and decorations to suit your taste.
Tips for Success
To ensure your Cherry Blossom Dream Cake turns out perfectly every time, consider the following pro tips:
Use Room Temperature Ingredients
For the best results, make sure your butter, eggs, and milk are at room temperature before you start baking. This helps them blend together more smoothly, resulting in a lighter, fluffier cake.
Measure Ingredients Accurately
Accurate measurements are crucial in baking. Use a kitchen scale for the most precise results, or make sure to spoon your flour into the measuring cup and level it off with a knife instead of packing it in. This will prevent your cake from being too dense.
Don’t Overmix the Batter
When combining the wet and dry ingredients, mix until just combined. Overmixing can lead to a tough cake, as it develops the gluten in the flour. Stop mixing as soon as you no longer see any dry flour.
Check Your Oven Temperature
Ovens can vary in temperature accuracy. To ensure your cakes bake correctly, use an oven thermometer to check that your oven is at the right temperature. This will help prevent underbaking or overbaking.
Cool Completely Before Frosting
Allow your cakes to cool completely on a wire rack before frosting them. If you frost a warm cake, the frosting can melt and slide off, ruining your beautiful design.
Experiment with Decorations
Feel free to get creative with your decorations! Aside from cherry blossom petals, consider adding edible glitter, fresh fruit, or colored sprinkles for a fun twist. This allows you to personalize the cake for any occasion.
Practice Patience
Lastly, remember that baking is a science that requires patience. Take your time with each step, and don’t rush the baking or cooling processes. Enjoy the journey of creating your Cherry Blossom Dream Cake!
Variations
The Cherry Blossom Dream Cake is a versatile recipe that lends itself to numerous delightful variations. Here are some creative ideas to switch things up and personalize your cake:
Flavor Variations
- Vanilla Cherry Blossom Cake: Replace the cherry blossom extract with high-quality vanilla extract for a classic vanilla flavor. You can still use the pink food coloring for that lovely hue.
- Chocolate Cherry Blossom Cake: For a chocolate twist, add 1/2 cup of cocoa powder to the dry ingredients. This pairs beautifully with the floral notes of the cherry blossom.
- Citrus Cherry Blossom Cake: Incorporate zest from lemons or oranges into the batter for a bright, citrusy flavor that complements the cherry blossom essence. A splash of citrus juice can also enhance the cake’s moisture.
- Fruit-Infused Cherry Blossom Cake: Add small pieces of fresh cherries or raspberries to the batter for a fruity surprise in every bite. The tartness of the berries will balance the sweetness of the cake.
Dietary-Friendly Adjustments
- Gluten-Free Cherry Blossom Dream Cake: Substitute all-purpose flour with a gluten-free flour blend to make this cake gluten-free. Ensure that your baking powder is also gluten-free.
- Vegan Cherry Blossom Dream Cake: Replace the eggs with flaxseed meal (1 tablespoon of flaxseed meal mixed with 2.5 tablespoons of water per egg), use plant-based butter or coconut oil, and swap milk for almond or oat milk.
- Reduced Sugar Cherry Blossom Cake: Cut down on granulated sugar by 1/2 cup and use a sugar substitute like Stevia or monk fruit sweetener to reduce the overall sugar content while maintaining sweetness.
With these variations, you can easily adapt the Cherry Blossom Dream Cake to suit different tastes and dietary preferences, making it a perfect dessert for any gathering!
Storage & Reheating Instructions
To keep your Cherry Blossom Dream Cake fresh and delicious, proper storage is essential. Here’s how to store your leftovers and reheat them if necessary:
Best Storage Methods
Once your Cherry Blossom Dream Cake is fully cooled, wrap it tightly in plastic wrap or aluminum foil to prevent it from drying out. If you have leftover slices, you can store them in an airtight container. The cake can be kept at room temperature for up to 2 days. For longer storage, it’s best to refrigerate the cake, where it can last for about a week.
If you want to store the cake for an extended period, consider freezing it. To freeze, wrap the cake tightly in plastic wrap and then in aluminum foil to protect it from freezer burn. The cake can be frozen for up to 3 months. When you’re ready to enjoy it again, simply transfer it to the refrigerator to thaw overnight.
Reheating Tips
If you prefer your cake warm, you can reheat individual slices in the microwave. Place a slice on a microwave-safe plate and heat for about 10-15 seconds, checking to ensure it doesn’t get too warm. For larger portions, you can reheat the cake in the oven at 350°F (175°C) for about 10-15 minutes. Cover the cake with aluminum foil to prevent it from drying out while reheating.
Enjoy your Cherry Blossom Dream Cake fresh, whether it’s straight from the oven or after a short time in the fridge or freezer!
FAQ Section
What If My Cherry Blossom Dream Cake Doesn’t Turn Out Right?
If your Cherry Blossom Dream Cake doesn’t rise properly or turns out dense, it may be due to overmixing the batter or using expired ingredients. Always check the freshness of your baking powder and ensure you measure your ingredients accurately. If the cake is too dry, it could be overbaked; keep an eye on the baking time and test for doneness with a toothpick.
Can I Prepare This Cherry Blossom Dream Cake in Advance?
Absolutely! You can prepare the Cherry Blossom Dream Cake a day in advance. Once baked and cooled, wrap it tightly in plastic wrap and store it in the refrigerator. This helps the flavors meld together. Frost it just before serving for the best presentation and freshness.
What Ingredients Can I Swap in the Cherry Blossom Dream Cake Recipe?
There are several substitutions you can make in the Cherry Blossom Dream Cake recipe. For a dairy-free option, use almond milk or coconut milk instead of regular milk. If you need a gluten-free version, replace all-purpose flour with a gluten-free flour blend. Additionally, you can use a different extract, such as vanilla or almond, if cherry blossom extract is unavailable.
How Do I Know When My Cherry Blossom Dream Cake is Done Baking?
The best way to determine if your Cherry Blossom Dream Cake is done is by performing the toothpick test. Insert a toothpick into the center of the cake; if it comes out clean or with a few moist crumbs, your cake is ready. If the batter sticks to the toothpick, give it a few more minutes in the oven.
Can I Use Fresh Cherry Blossoms for Decoration?
Yes, using fresh cherry blossoms for decoration can enhance the visual appeal of your Cherry Blossom Dream Cake! Just make sure that the blossoms are edible and free from pesticides. Rinse them gently before using them to adorn your cake, creating a beautiful and authentic springtime dessert.
Print

Cherry Blossom Dream Cake
- Total Time: 1 hour
- Yield: 12 servings 1x
- Diet: Vegetarian
Description
A delicious and visually stunning cake inspired by cherry blossoms.
Ingredients
- 2 cups all-purpose flour
- 1 1/2 cups granulated sugar
- 1 cup unsalted butter, softened
- 4 large eggs
- 1 cup milk
- 2 teaspoons baking powder
- 1 teaspoon vanilla extract
- 1/2 teaspoon salt
- Cherry blossom extract to taste
- Pink food coloring
- Buttercream frosting
- Cherry blossom petals for decoration
Instructions
- Preheat the oven to 350°F (175°C).
- In a bowl, cream together butter and sugar until light and fluffy.
- Add eggs one at a time, mixing well after each addition.
- Stir in milk and vanilla extract.
- In another bowl, combine flour, baking powder, and salt.
- Gradually add the dry ingredients to the wet mixture.
- Add cherry blossom extract and food coloring, mixing until combined.
- Pour the batter into prepared cake pans.
- Bake for 25-30 minutes or until a toothpick comes out clean.
- Let the cakes cool completely before frosting.
- Decorate with buttercream frosting and cherry blossom petals.
Notes
- Use fresh cherry blossoms for decoration if available.
- Adjust the amount of cherry blossom extract to your taste.
- Store the cake in a cool place to maintain freshness.
- Prep Time: 30 minutes
- Cook Time: 30 minutes
- Category: Dessert
- Method: Baking
- Cuisine: American
Nutrition
- Serving Size: 1 slice
- Calories: 350
- Sugar: 28g
- Sodium: 150mg
- Fat: 18g
- Saturated Fat: 10g
- Unsaturated Fat: 8g
- Trans Fat: 0g
- Carbohydrates: 42g
- Fiber: 1g
- Protein: 4g
- Cholesterol: 70mg
Keywords: Cherry Blossom Dream Cake, cake, dessert, cherry blossoms, baking
Find it online: https://cravirecipes.com/cherry-blossom-dream-cake/